Radon Mitigation Ottawa ON: A Step-by-Step Guide for Homeowners
Introduction
Radon gas has become one of the most talked-about indoor air quality concerns in Ottawa. As more homeowners become aware of the risks associated with long-term radon exposure, the demand for radon testing and mitigation in Ottawa ON continues to grow. Health Canada warns that radon is the second leading cause of lung cancer, and Ottawa is among the regions with the highest radon levels in Canada.
Whether you live in an older property or a newly built home, understanding the radon mitigation process is crucial. Many Ottawa homeowners know they need to deal with radon but are unsure where to start. This is why a clear, step-by-step guide is essential for anyone who wants to protect their home and family.
This detailed, homeowner-friendly article explains every step of radon mitigation, from initial testing to professional installation and long-term maintenance. By the end, you’ll have a complete understanding of how radon mitigation in Ottawa ON works, what to expect during installation, and how to ensure your system continues performing effectively for years to come.
What Homeowners Need to Know About Radon in Ottawa
Radon is a naturally occurring radioactive gas that forms from the decay of uranium in rock and soil. It enters homes through foundation cracks, floor drains, sump pumps, and gaps in concrete walls. Since radon is invisible, odorless, and impossible to detect without proper testing, many homeowners live with high radon levels without realizing it.
Why Radon Levels Are High in Ottawa
Ottawa has several environmental and structural characteristics that make radon levels particularly high:
- The region’s soil contains natural uranium deposits.
- Ottawa winters trigger greater indoor suction, pulling more radon inside.
- Many homes have basements, which are underground and vulnerable to radon entry.
- Tightly sealed modern homes trap radon indoors.
- Older homes may have foundation cracks or outdated construction.
These factors elevate radon concentrations, especially during winter months. Because of this, every Ottawa homeowner should take radon testing seriously.
Why Radon Mitigation Matters
Radon mitigation is not simply a home improvement—it is a health protection strategy.
Health Risks
Breathing radon over long periods exposes lung tissue to radiation. This increases the risk of lung cancer, especially for:
- Children
- Smokers
- Elderly individuals
- People with respiratory issues
Even nonsmokers face a significant risk from radon exposure.
Home Value Benefits
A home with a radon mitigation system installed:
- Increases buyer confidence
- Improves resale value
- Reduces negotiation issues during inspection
- Meets modern indoor air quality expectations
Ottawa home inspectors often recommend radon testing before buying or selling, making mitigation an advantage for property owners.
Radon Mitigation Ottawa ON: Step-By-Step Guide
This complete guide walks you through each step of the radon mitigation process—from testing to installation to system maintenance.
STEP 1: Conduct a Radon Test
Before installing a mitigation system, homeowners must first know their radon levels.
Types of Radon Tests
1. Short-Term Test (48 to 96 hours)
Useful for quick results, often used when buying or selling a home.
2. Long-Term Test (3 to 12 months)
Provides the most accurate reading due to seasonal fluctuations.
Where to Place the Test
- Lowest livable level (basement)
- Away from drafts or vents
- At least 20 inches above the floor
- Not in a kitchen or bathroom
Ottawa homeowners are encouraged to test between October and April, when radon levels are highest.
STEP 2: Hire a Certified Radon Mitigation Professional
Choosing the right professional is essential for accurate diagnosis and proper mitigation. Ottawa homeowners should look for:
- Certified radon mitigation specialists
- Experience working with Ottawa soil and foundation styles
- Clear pricing with no hidden fees
- Strong customer reviews
- Written guarantee or warranty
Avoid “handyman” services without proper radon training. Radon mitigation requires technical knowledge and specialized equipment.
STEP 3: Home Inspection and Diagnostic Assessment
Once you hire a professional, they will begin with a detailed inspection of your home. This step determines the best mitigation strategy.
See also: How Much to Set Aside for Preparing Your Home Makeover
What Professionals Look For
- Foundation cracks
- Floor-wall gaps
- Sump pump openings
- Drain tile systems
- Concrete slab condition
- Basement layout
- Venting locations
- Soil communication potential
- Crawlspaces
- Existing ventilation systems
Diagnostic Testing
Professionals may use:
- Pressure field extension testing
- Smoke tests
- Infrared imaging
- Concrete scanning
These tests help determine the best location for suction points and whether one or multiple pipes are needed.
STEP 4: Choose the Right Radon Mitigation
System
In Ottawa, the most effective system is Active Sub-Slab Depressurization (ASD).
Most Common Radon Mitigation Systems in Ottawa
1. Sub-Slab Depressurization (SSD) – Most Effective
A pipe is installed through the basement slab and connected to a radon fan. The fan pulls radon from beneath your home and vents it outside.
2. Sump Pit Depressurization
If your home has a sump pump, this can sometimes serve as the suction point.
3. Crawlspace Depressurization
Crawlspaces require a sealed vapor barrier and suction system.
4. Block Wall Depressurization
Used when block foundations leak radon gas.
5. Heat Recovery Ventilation (HRV)
Improves ventilation; useful in combination with SSD.
The system selected depends on your home’s foundation, layout, and radon levels.
STEP 5: System Installation
This is the most important part of the process. Let’s break down exactly what happens during installation.
1. Creating the Suction Point
A technician drills a hole into the basement floor to reach the soil beneath the slab. This becomes the connection point for the mitigation system.
Why This Matters
The suction point:
- Reduces soil gas pressure under the home
- Prevents radon from entering
- Creates a controlled airflow path
Ottawa homes typically require 1–2 suction points depending on basement size and soil conditions.
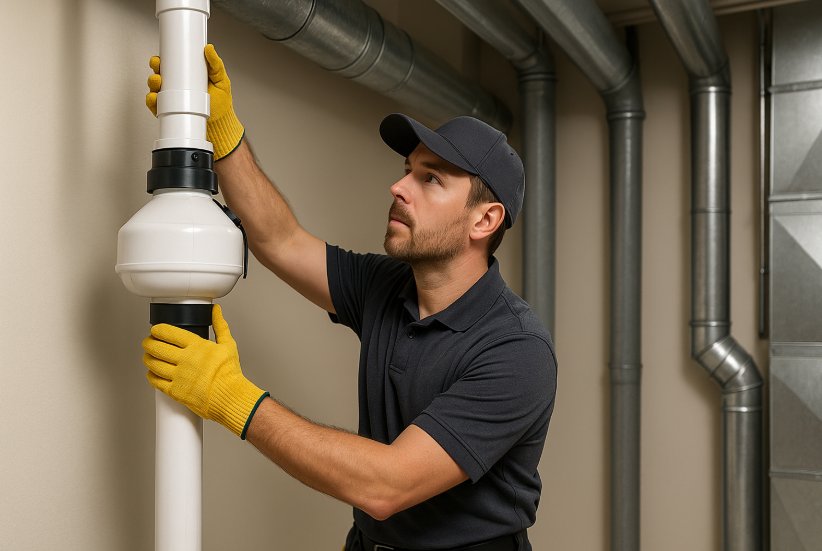
2. Installing the PVC Vent Pipe
A PVC pipe is connected to the suction point and runs:
- Up through the basement
- Through mechanical rooms
- Into the attic or outside wall
- Out to a safe venting location
Proper pipe placement is essential. Incorrect routing can reduce system effectiveness.
3. Installing the Radon Fan
The radon fan is the heart of the mitigation system. It creates negative pressure beneath your home.
Fans are typically installed:
- Outside the house
- In the attic
- In a garage
- In a mechanical room (if allowed by code)
Why the Fan Must Be Outside the Living Space
If the fan fails or leaks, radon must be released outdoors, not indoors. This is a safety requirement.
4. Sealing Entry Points
Technicians seal cracks, gaps, and openings in:
- Floors
- Walls
- Sump pits
- Foundation joints
This prevents radon from bypassing the system.
5. Venting Radon Outdoors
The vent pipe must discharge:
- Above the roofline
- Far from windows and doors
- Away from high-traffic areas
- At a safe distance per building codes
This ensures radon safely dissipates into the atmosphere.
STEP 6: System Performance Testing
Once the system is installed, the technician performs several tests to ensure proper function.
What They Check
- Pressure levels
- Airflow performance
- Suction point effectiveness
- Fan operation
- Pipe sealing
- Noise levels
- Outdoor venting
Post-Mitigation Radon Testing
A follow-up radon test is performed to confirm radon levels have been reduced.
This test is usually done:
- Immediately after installation
- Or within 30 days
Homes should reach radon levels below 200 Bq/m³, but many systems reduce levels far lower.
STEP 7: Homeowner Education
A good professional will explain:
- How to read the system gauge
- Signs the system needs service
- Fan maintenance tips
- Testing schedule
- Warranty details
- Troubleshooting steps
Understanding the system helps keep your family safe long-term.
STEP 8: Long-Term Maintenance
Radon mitigation systems require minimal maintenance, but periodic checks ensure performance.
Maintenance Tips
- Inspect the fan yearly
- Check the U-tube manometer monthly
- Replace fans every 7–10 years
- Retest radon every 2 years
- Keep the vent clear of snow or debris
A properly maintained system lasts for decades.
Cost of Radon Mitigation in Ottawa ON
While prices vary, Ottawa homeowners can expect to pay:
$2,100 to $3,800
Factors affecting cost include:
- Home size
- Foundation type
- Radon levels
- Soil conditions
- Fan type
- Number of suction points
- Vent route complexity
- Crawlspace requirements
The investment is small compared to the health benefits and long-term safety it provides.
Common Mistakes Homeowners Make
1. Delaying testing
Radon levels don’t decrease without intervention.
2. Using DIY kits instead of professionals
DIY setups often fail or make radon levels worse.
3. Ignoring long-term testing
Radon varies seasonally—you need accurate results.
4. Hiring unqualified installers
Improper installation can be dangerous and ineffective.
5. Not maintaining the system
Fans eventually wear out; regular checks are needed.
Benefits of Professional Radon Mitigation
✔ Reduces radon by up to 99%
✔ Protects your family’s health
✔ Improves indoor air quality
✔ Increases home value
✔ Ensures compliance with safety guidelines
✔ Long-term peace of mind
Professional mitigation is the only reliable way to lower radon levels safely and effectively.
Signs Your Radon Mitigation System Is Working
Homeowners can check system performance by monitoring:
- The fan noise
- The manometer pressure level
- Airflow at the outdoor vent
- Radon retest results
If pressure drops or the fan stops working, contact a professional immediately.
Final Thoughts: Radon Mitigation Ottawa
ON is Essential for Every Homeowner
Simons Radon mitigation is one of the most effective and affordable ways to protect your family from long-term health risks. In a region like Ottawa—where radon levels are frequently above recommended guidelines—mitigation is not optional; it is an essential part of maintaining a healthy home.
By following the step-by-step process outlined in this guide, homeowners can confidently navigate radon mitigation from start to finish. From testing and hiring a certified professional to installation and long-term care, every step ensures your home remains safe, healthy, and radon-free.